Signature Relief
formal: to introduce the studio fundamentals of "bas" relief (low relief) and "haut" relief (high relief) sculpture.
technical: to gain experience in making clay face molds and casting plaster.
conceptual: To show how the way in which we make marks in large measure determines our personal style.
Project References
Materials
Preliminary:
1. Before coming to class, review the thematic concept of Identity as found on the website. Also read the discussion Relief for Unit II. Review the Project References above.
Activities:
a) roll out three slabs of
clay about 3/4 inch thick. Min. dimension: 6 inches.
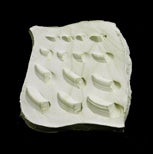
b) in the first slab, create an "overall" pattern of repeated
marks using UNITY principles from 2D.
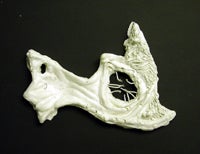
c) in the second slab, create a composition with a distinct center of
interest employing your own vocabulary of marks.
d) use the third slab to make a wall around your two compositions. Cut
strips 1 1/2 - 2 inches wide and attach them to the edges of your slabs
to make a low water tight container. These will serve as molds for your
plaster relief sculptures.
e) take a length of wire (alum, or steel--8 to 14 gauge) a little longer
than your mold is wide. Wrap each of the ends around each of the two nails.
This will be your hanger. Set it aside.
f) mix up plaster of paris sufficient to fill your two molds. (fill
your bucket with a little less water than would fill your two forms. Slowly
sprinkle in plaster. Do not stir until an island forms in the middle that
doesn't sink. Mix up completely with your hands or a good spatula. It
will seem kind of thin and watery.) Pour into your molds. After about
ten minutes, insert your wire hanger in the upper half of the mold. When
the plaster has almost set (almost twenty minutes) sign your name and
date the work.
g) if the work is delicate, let it set overnight in a plastic bag (so
clay won't dry...) If you're bold, peel the clay as soon as the plaster
has set. Don't use much force or the plaster will crack.
Final thoughts:
Your final plaster reliefs can be presented as either wall pieces or table-top works. What alternative methods of presentation could you employ? Consider introducing "foreign" elements into your reliefs by embedding objects into your clay mold that would, in turn, become part of your final plaster. How would the use of color change the effect of your reliefs?
Critique Ideas
When you have completed your
sculpture, divide into small groups and exchange artworks with another
group from the class. Within your group, work together to respond to each
sculpture in turn. Consider the following:
1. Describe the techniques for creating "relief sculptures"
that your fellow artists used and explain how various problems were addressed
("void-volume reversal," design, function, response to problem,
etc.).
2. Point out any personal symbols or marks the artist used to indicate a particular meaning or sense of identity.
3. Discuss ideas the artwork seems to communicate. After some sharing of interpretations, attempt to state the "message" of the design in one sentence. (This artwork is about. . .)
4. Explain how the shapes, symbols, or other elements of the design support its message.
Notebook
Your notebook should include
the following:
1. Evidence of your research (print-outs from magazines, web searches,
interviews with artists, etc.).
2. Your design process (drawings, computer-printouts, photos).
3. Supplemental materials (receipts, notes about technique or materials)
4. Final documentation in the form of drawings, computer print-outs, or photographs.

