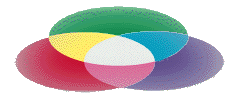
Mixing Light

Studio Fundamentals: To gain experience in the use of additive light techniques. To use computers as a tool for evaluating the effects of RGB color (via studio lighting, digital photography, Adobe PhotoShop).
Concept: To gain experience in working as part of a collaborative team.
- Zelanski and Fisher, Color, pages 77 - 86.
- Adobe PhotoShop help menu
- http://www.bamagazine.com/RGB/
- http://www.wackerart.de/mixer.html
- http://www.efg2.com/Lab/Graphics/Colors/index.html
- http://www.bway.net/~jscruggs/index3.html
- http://www.adobe.com/education/pdf/exchange/color_theory_curriculum.pdf
Preliminary:
Before coming to class, review the thematic concept of Collaboration as found on the website. Also read the discussion Additive Color for Unit III. Review the Project References and Vocabulary above.
Activity:
Step One: As a member of a collaborative team, create an interesting Still Life with a good range of values and hues.
Step Two: Frame the scene in the viewfinder of a digital camera mounted on a tripod.
Step Three: Photograph the same scene four times--once using temperature balanced white light and three more times using each of three RGB Wratten filters. Each team should produce: 1) A "regular" color photograph using color balanced white light; 2) A "red" photograph using a Kodak Wratten filter over a white light source; 3) A "green" photograph using a Kodak Wratten filter over a white light source; 4) A "blue" photograph using a Kodak Wratten filter over a white light source.
Step Four: Reassemble three colored digital photographs in Photoshop to produce an image that matches as closely as possible the original photograph taken under white light.
1. Open the red, green, and blue images in Photoshop.
2. Open a new document with a black background that is slightly larger than the three images.
3. Use the move tool (v) to drag each image into the new document. This will automatically put each image on a separate layer.
4. In the layers palette, click on one of the image layers and change the blending mode (use the drop down menu at the top of the palette) to "lighten."
Repeat this procedure for the other two image layers.
5. Use the move tool to register the three images. The resulting composite should appear close to neutral.
Alternative outcome: Using a standard ink jet printer, print out each color channel (R,G,B) from Photoshop onto separate clear acetate sheets. Use three overhead projectors to demonstrate additive color mixing by overlapping three projected images.
Students learn primarily by hands-on involvement in this assignment, and also by seeing the additive light mixing happen before their eyes--both with the projected light sources and in Photoshop.
Points to discuss may include the following:
- How does the original "white light" photograph compare with the photograph produced by combining the three differently colored RGB photographs?
- What is the relationship of RGB color to CMYK color?
- How do Lighting Designers use additive light principles?
- How does a cathode ray tube (i.e., video monitor) utilize RGB?